How to Spot and Treat Root Rot Before It Kills Your Plant
How do I know if my plant has root rot and can I save it?
On this page
What Root Rot Actually Is (and Why Overwatering Causes It)
Root rot is exactly what it sounds like: your plant's roots dying and decaying below the soil line. And in the vast majority of cases, the trigger isn't neglect—it's too much love in the form of too much water. Waterlogged soil, not underwatering, is the most common houseplant killer, so if you're worried you've been overdoing it, you're already looking in the right place.
Here's the simple mental model. Roots need air, not just water. When soil stays soggy, water fills every pocket that would normally hold oxygen, and the roots essentially suffocate. That constant wetness also creates the perfect home for fungi and bacteria (tiny organisms that break down plant tissue). They multiply in the wet soil and begin eating the roots, usually starting at the delicate root tips and spreading inward from there.
You may see scary names like Pythium, Phytophthora, Rhizoctonia, or Fusarium in other articles—these are the fungi most often behind root rot. You don't need to memorize a single one. They all share one weakness: they thrive in wet soil. Control the moisture and you cut off their fuel supply. The takeaway is drainage and watering habits, not Latin.
One reassuring note: not every fungus in your pot is out to get you. Some only break down roots that are already dead and never touch the healthy ones. Still, when true rot takes hold, it moves fast—an unchecked case can claim a whole plant in as little as a few weeks. That's why spotting it early, which we'll cover next, matters so much.
The Warning Signs: How to Tell If Your Plant Has Root Rot
Root rot (roots dying because the soil stays too wet for air to reach them) usually shows up above ground before you ever see the roots. Learning to read these early signals gives you the best shot at saving the plant.
Start with growth that stalls
The very first sign is often slow or stunted growth. It's subtle and easy to miss—your plant just seems to sit there for weeks without pushing out new leaves. On its own it's rarely alarming, but paired with the signs below, it's a red flag.
Watch the oldest, lowest leaves
Yellowing leaves are one of the most common symptoms. With root rot, the oldest leaves and the ones closest to the soil tend to yellow first. Left unchecked, those leaves brown, die, and drop.
The single most telling clue
If you notice one thing, make it this: a plant that wilts even though the soil is still wet. Healthy plants wilt when they're thirsty. When the soil is damp but the plant droops anyway, the roots have stopped working—a classic root rot signature.
Trust your nose
Give the soil a sniff. A musty, mildew, or rotting-vegetation smell—sometimes with visible mold on the surface—points to roots decomposing below.
One more quirk
In a pot with several stems, it's common for only one stem to show symptoms while the rest look fine. Don't dismiss it because the plant "mostly" looks okay.
An important caveat
Many things cause yellow leaves and wilting—underwatering, low light, and normal aging among them. Above-ground signs point you in the right direction, but they aren't proof. To confirm root rot, you have to slide the plant out and check the roots directly, which we'll cover next.
Confirm It: How to Inspect the Roots
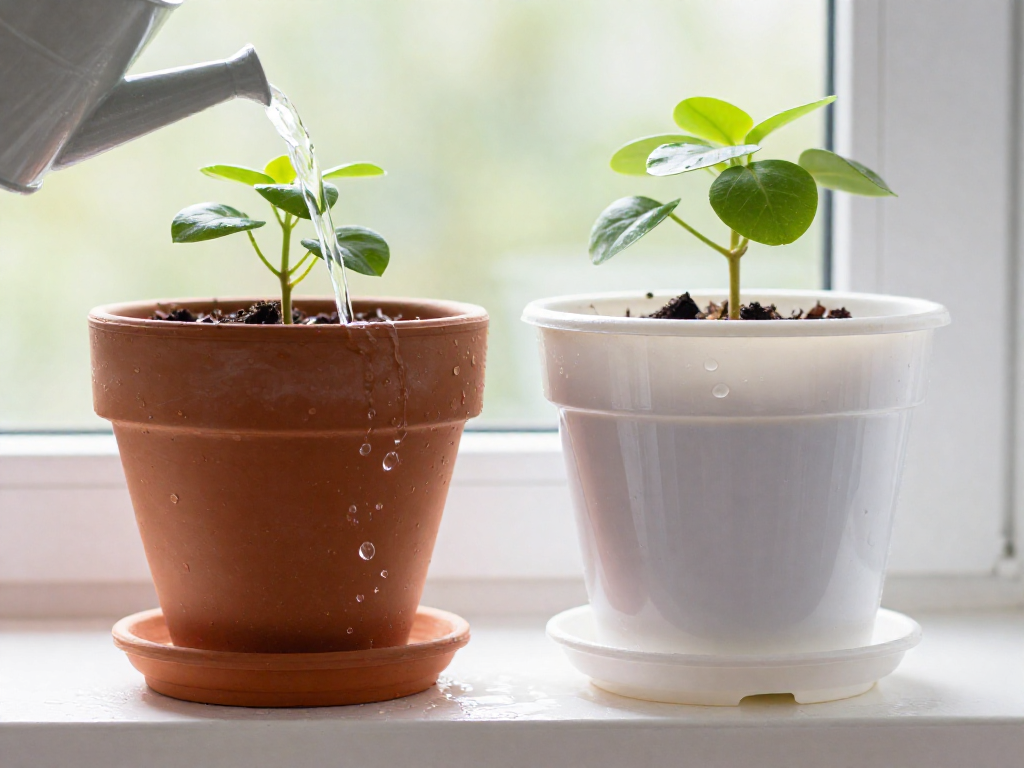
Yellow leaves, wilting, and mushy stems all point to root rot—but so do a dozen other problems. The only way to know for sure is to look at the roots themselves.
Do this over a sink or outside, since it gets messy. Gently tip the plant sideways and slide it out of its nursery pot (the thin plastic pot it came in). Support the base of the stems with one hand and ease the root ball free rather than yanking on the leaves.
Read the roots. Here's what you're looking for:
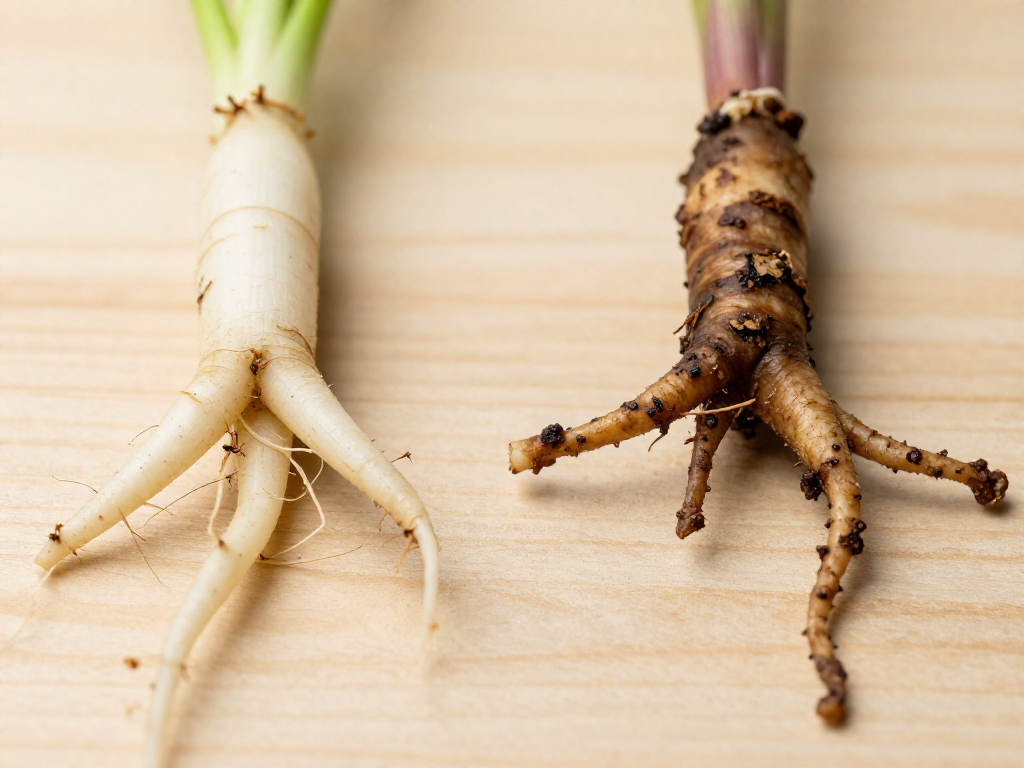
- Healthy roots are firm and white (a few plants have naturally tan roots, but they'll still feel firm).
- Rotting roots are soft and turn brown, tan, or yellow.
- Advanced rot is mushy, black, and gives off a foul, musty smell.
If the soil clings and blocks your view, rinse the roots under lukewarm water for a clear look. Skip cold water—it can shock the healthy roots you're trying to save.
The mushiness test settles it. Pinch a few roots between your fingers. Soft, squishy roots that fall apart or slide off in your hand are dead. Firm roots that hold their shape are still alive.
One caveat: if you recently moved a plant from water to soil, its old water roots naturally turn brown and mushy as new soil roots grow in. If you see two different root types and there's no foul smell, that's transition, not rot.
Not Every Brown Root Is Root Rot: The Look-Alikes
Before you grab the scissors, know this: a brown, mushy root isn't always rot. Panicking and cutting away healthy roots can hurt a plant that was never sick.
The most common false alarm happens after water propagation—growing a cutting in a jar of water until it sprouts roots, then moving it to soil. Water roots and soil roots are built differently, so once your cutting hits the potting mix, it starts growing new soil-adapted roots and lets the old water roots die off. Those old roots turn brown and mushy as they degrade. That's normal, not rot.
Here's how to tell the difference:
- Look for two root types. If you see thin, brown, dying roots alongside firmer, healthier new ones, your plant is likely just transitioning.
- Do the smell test—your best tie-breaker. True root rot has a foul, musty smell like rotting vegetation. A transitioning root ball doesn't stink.
- Check firmness across the whole root ball, not one root. Widespread mush plus a bad odor points to rot; a few soft roots on an otherwise firm, odor-free system does not.
When in doubt: no smell, mixed root types, mostly firm roots? Give it time before cutting.
Can You Save It? Making the Call
Before you start the rescue, do a quick gut check so you don't pour effort into a plant that's already gone.
Slip the plant out of its pot and feel the roots. Here's how to read what you find:
- All roots are brown, black, and mushy? It's too late. The whole root system is dead, and there's nothing left to grow from. Time to start fresh.
- Some firm, white roots remain? There's real hope. White, firm roots are alive and can support the plant while it recovers.
One thing to be clear about: root rot can't be "cured" or reversed. There's no fungicide or trick that brings dead roots back to life. Treatment means cutting away the dead parts and saving the living ones—nothing more.
The good news: the less root death there is, the faster your plant will bounce back. And even in severe cases, you may be able to rescue the plant by taking healthy cuttings (a piece of stem or leaf you regrow into a new plant) from the parts that are still green and firm.
Step-by-Step: The Root Rot Rescue Procedure
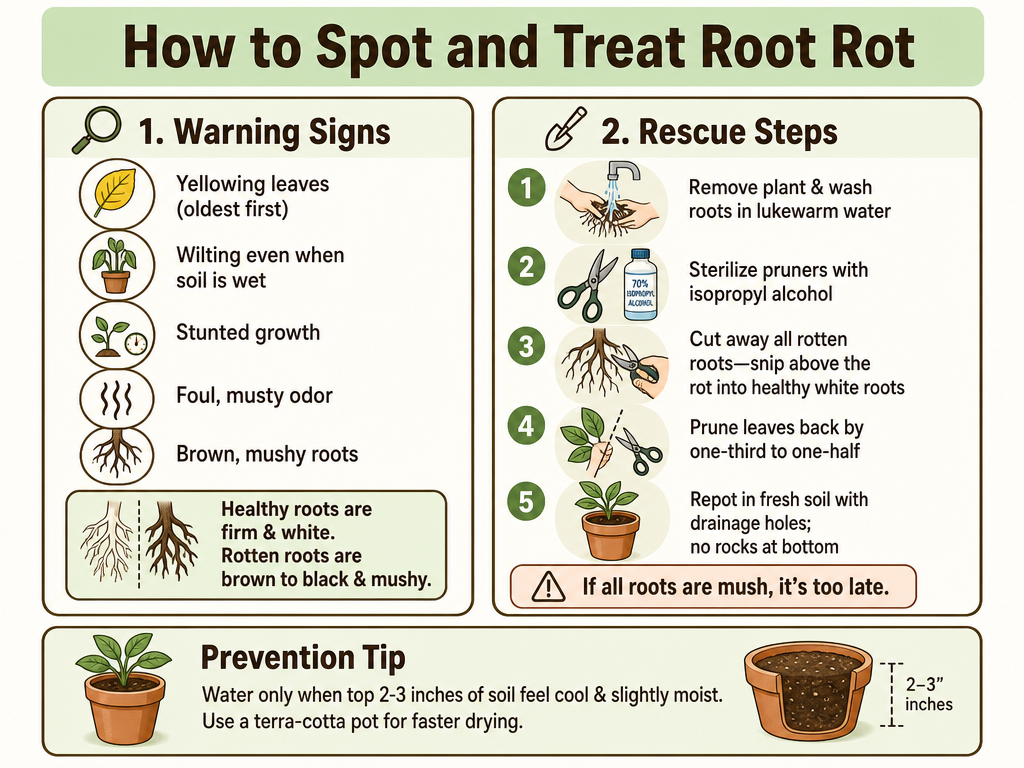
Once you've confirmed root rot (mushy, brown-to-black roots instead of firm white ones), work quickly. Do this over a sink or outside—it gets messy. Here's the full rescue, step by step.
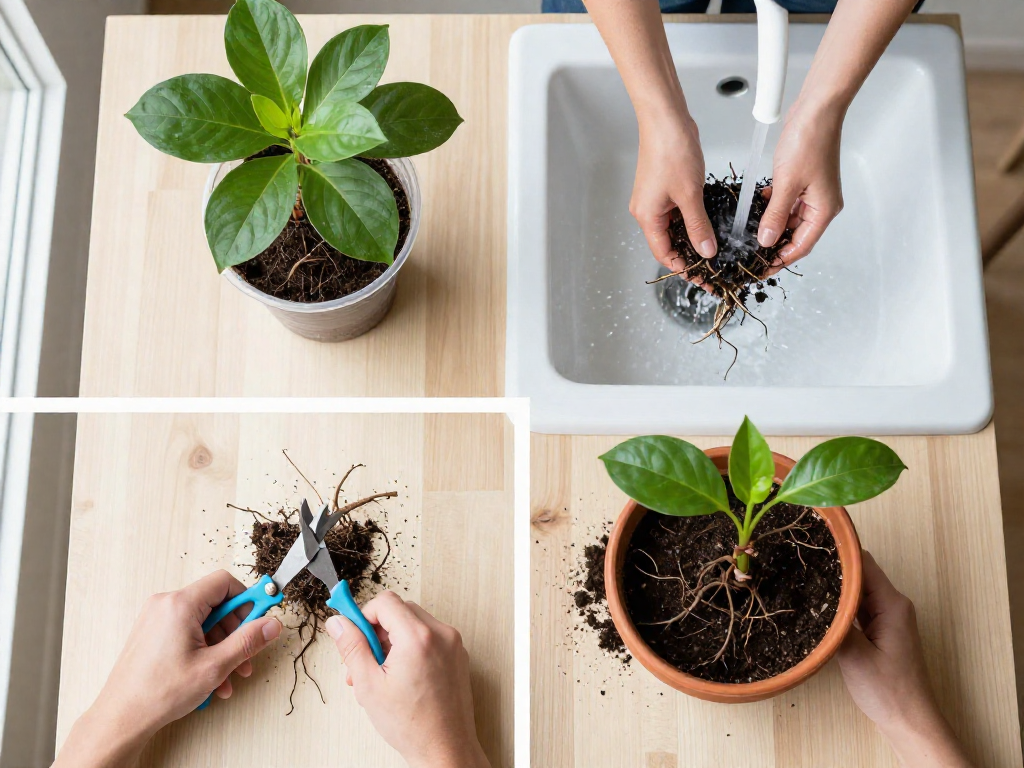
1. Unpot and rinse the roots. Slide the plant out of its pot and gently wash all the roots under warm or lukewarm running water. This clears away contaminated soil so you can clearly see which roots are healthy and which are rotten.
2. Sterilize your cutting tools first. Wipe your pruning scissors or snips with isopropyl (rubbing) alcohol, or dip them in a 10% bleach solution (1 part bleach to 9 parts water). Clean tools keep you from spreading fungal spores—the microscopic "seeds" fungi use to reproduce.
3. Cut away every rotten root. Snip off all the soft, dark, mushy roots. Cut above the rot, into healthy white tissue, so no rot is left behind. Re-sterilize your snips between cuts; otherwise you can carry rot from one root straight to a healthy one.
4. Prune the top growth back. Your root ball is now smaller, so it can't support all the leaves it once did. Using clean scissors, trim the foliage back by one-third to one-half. This eases the demand on the roots while the plant recovers.
5. Repot into fresh soil and a clean pot. Use fresh, pasteurized potting mix (heat-treated to kill pathogens) and a clean container. Never reuse the old, contaminated soil. Match the pot to the reduced root ball—an oversized pot holds excess wet soil that few roots can drink up, which is exactly how rot starts again.
6. Water lightly, then let it recover. Give it a small drink to settle the roots, then set it in bright, indirect light and hold off on heavy watering while it rebuilds.
The hydrogen peroxide question (optional). Some growers mist trimmed roots with a 1:1 mix of 3% hydrogen peroxide and water to kill lingering fungi. Others, including Costa Farms, skip it—plant sensitivities vary and it can damage roots. Treat this as optional, not a required step.
Aftercare: clean up. Disinfect your tools, work surface, and any clay pots with a 10% bleach solution or alcohol. Toss plastic pots that can't be fully cleaned—they're hard to disinfect and can reinfect your plant.
Prevent It From Coming Back
Root rot almost always traces back to soil that stays too wet. Fix your watering habits and your setup, and you won't repeat the cycle.
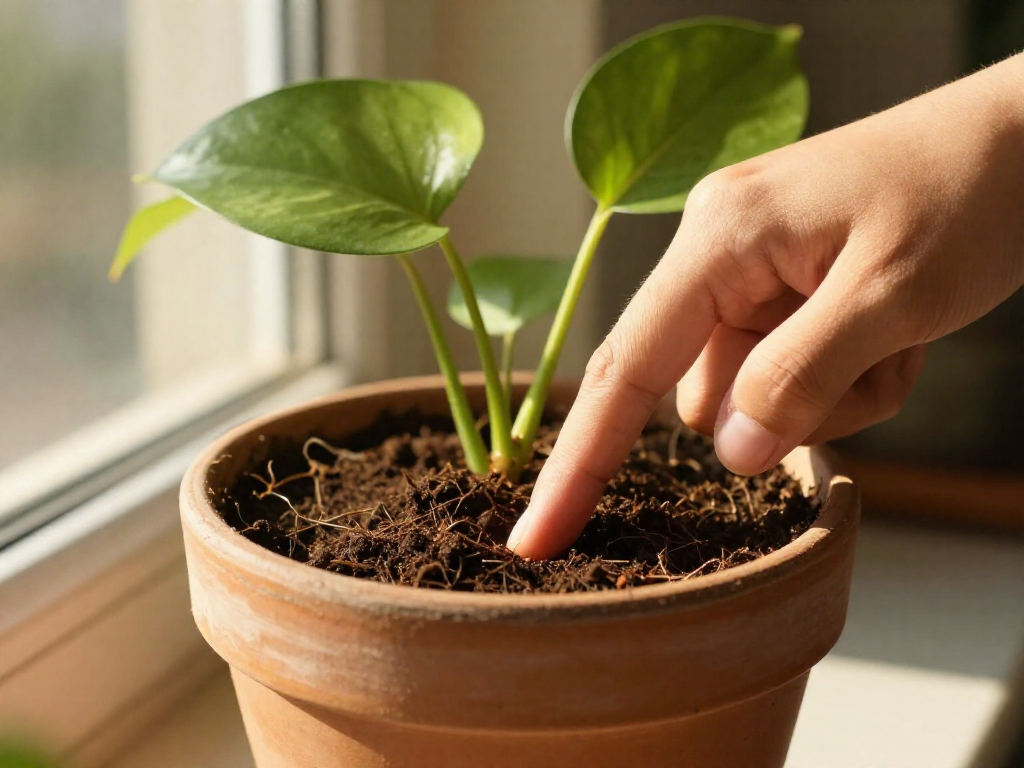
Water by testing, not by the calendar. Skip fixed schedules. Instead, stick a finger (or a moisture meter) into the pot: the soil should feel cool and only slightly moist 2 to 3 inches down before you water again. If it's wetter than that, wait a few days and check again.
Be careful with the popular "water when the top inch is dry" rule—it can mislead you. The surface dries out first, but moisture often stays trapped deeper down, especially when the soil is compacted (packed tight so water can't drain freely). That hidden wetness is a major cause of rot.
Get the pot right:
- Always use a pot with drainage holes. But do not add rocks or gravel at the bottom—despite the common myth, this actually inhibits drainage and keeps the soil wetter.
- Consider terra-cotta (unglazed clay) pots. Their porous sides let moisture evaporate from the walls, not just the top, so the soil dries faster than in plastic or ceramic.
- Don't over-pot. Jumping to a much larger container surrounds the plant with excess soil that stays wet while too few roots exist to absorb it—a classic rot setup. Size up gradually, an inch or two of extra diameter at a time.
Use fresh, pasteurized commercial potting mix—never soil dug from your garden, which can be compacted and carry disease.
Sources
- How to Identify, Fight and Fix Root Rot — pennington.com
- Root Rot Detection and Treatment for Plants – BWH Plant Co — bwhplantco.com
- What Does Root Rot Look Like & Best Treatment — spider-farmer.com
- Root rot: How to spot it and fix it | Patch — patchplants.com
- Root Rots on Houseplants – Wisconsin Horticulture — hort.extension.wisc.edu
- The signs to watch out for and how to fix root rot fast — lovethatleaf.co.nz
- Root Rot in Indoor Plants | Symptoms, Causes & Prevention — newprocontainers.com
- How To Fix Overwatering and Root Rot on Your Houseplants – Costa Farms — costafarms.com
- How to Repot a Plant — Seattle's Favorite Garden Store Since 1924 - Swansons Nursery — swansonsnursery.com
FAQ
How do I know if my plant has root rot or is just overwatered?
The only way to know for sure is to check the roots. Slide the plant out of its pot (do this over a sink or outside) and look: healthy roots are firm and white, while rotting roots are soft, brown, or mushy black and often give off a musty, mildew-like smell. Overwatering without rot leaves the roots still firm and white, just sitting in soggy soil. A telltale sign of rot is a plant that wilts even though the soil is wet, along with yellowing of the oldest, lowest leaves. One exception: if you recently moved a plant from water propagation into soil, the old water roots naturally turn brown and mushy as new soil roots form—if there's no foul odor and you see two different root types, it's transition, not rot.
Can a plant recover from root rot on its own without repotting?
No. Root rot won't cure itself, and leaving the plant in its wet, contaminated soil lets the rot keep spreading. The rotten roots are already dead, so the goal is treatment, not healing—you need to remove the plant, cut away all the affected roots, and repot into fresh soil. If a lot of root death has already occurred, recovery is difficult and total loss can happen within a few weeks. Your best chance is to act quickly while some firm, white roots remain.
Should I use hydrogen peroxide to treat root rot?
It's optional and opinions differ. Some growers mist trimmed roots with a 1:1 mix of 3% hydrogen peroxide and water before repotting to kill lingering fungi and bacteria. However, others (including Costa Farms) advise against it because different plants have different sensitivities and it can cause further root damage. If you want to play it safe, skip the peroxide and instead sterilize your pruners between each cut to avoid spreading spores, then simply prune away all rot and repot into fresh, well-draining mix. If you do use peroxide, dilute it as above and test cautiously.
How long does it take for root rot to kill a plant?
There's no fixed timeline—it depends on the plant, the severity, and the conditions—but once root rot takes hold, total plant loss can happen in as little as a few weeks. Rot starts quietly at the root tips and often shows first as stunted growth, then spreads as fungal spores multiply in the soggy soil, eventually causing widespread yellowing and wilting. Because early signs are easy to miss, the practical takeaway is to act the moment you suspect it rather than counting on a grace period.
Do I have to remove all the soil when treating root rot?
Yes—rinse the roots clean so you can see and treat the problem properly. Gently wash all the roots under lukewarm running water (cold water can further shock the healthy roots) to remove the old, contaminated substrate and give you a clear view of what's rotten versus healthy. Then, with pruners sterilized in isopropyl alcohol, cut above the rot into healthy tissue so none is left behind, and repot into fresh potting mix. Reusing the old soil would just reintroduce the fungi you're trying to get rid of.
Can I reuse the pot after a plant had root rot?
You can reuse a clay or ceramic pot if you disinfect it first—scrub it and soak or wipe it with a 10% bleach solution, a detergent solution, or alcohol to kill any lingering fungal spores. Do the same for your tools and work surfaces. Plastic pots are not recommended for reuse after root rot because they're hard to disinfect thoroughly. When you repot, use a pot with drainage holes and fresh, pasteurized commercial potting mix, and don't add rocks or gravel to the bottom—that actually inhibits drainage rather than helping it.
See also
- How often should I water my houseplants?
- The best pots and drainage setups for beginner plant parents
- How to repot a houseplant without shocking it
- How to propagate houseplants from cuttings
Related articles
My New Plant Is Dropping Leaves: Is It Normal?
New plant dropping leaves after you brought it home? Learn when leaf drop is normal acclimation and when it signals a real problem you need to fix.
Jul 14, 2026 · 5 min read
Leggy, Stretched-Out Plants: Why and How to Fix It
Is your plant growing tall, pale, and sparse? Learn what causes leggy, etiolated growth and the exact steps to fix it and prevent it from coming back.
Jul 14, 2026 · 10 min read
Overwatering vs. Underwatering: How to Tell the Difference
Is your plant overwatered or underwatered? Compare symptoms side by side, run 4 quick checks, and follow plant-by-plant recovery steps for apartment plants.
Jul 14, 2026 · 8 min read