How to Repot a Houseplant Step by Step
How and when do I repot a houseplant?
On this page
Open by naming the #1 beginner fear ("Am I going to kill my plant by repotting it?") and reassure that repotting is simple once you know the timing, the pot size, and a handful of steps. Frame the whole article as a plant-by-plant, no-experience-needed walkthrough, and preview the single biggest mistake newcomers make: jumping to a giant pot.
When Should You Repot? Timing and Warning Signs
Repot when your plant shows it has outgrown its pot, and do it at the right time of year. The short answer: most houseplants need repotting only once every three to five years, and spring is the best season to do it (University of Arkansas; Penn State).
The Best Time of Year
Aim for spring, just before the active growing season—the stretch of months when your plant naturally puts out new leaves and roots. Repotting then lets roots settle into fresh mix and push new growth (Penn State; The Spruce). Spring and summer are both ideal; in milder US climates, early fall works too. Winter is a last resort—only repot then if you're dealing with root rot or a serious soil problem that can't wait (Joy Us Garden).
Don't repot on a schedule for its own sake. Few plants need it more than once a year, and most are happy for three to five years between moves (University of Arkansas).
Signs It's Time to Repot
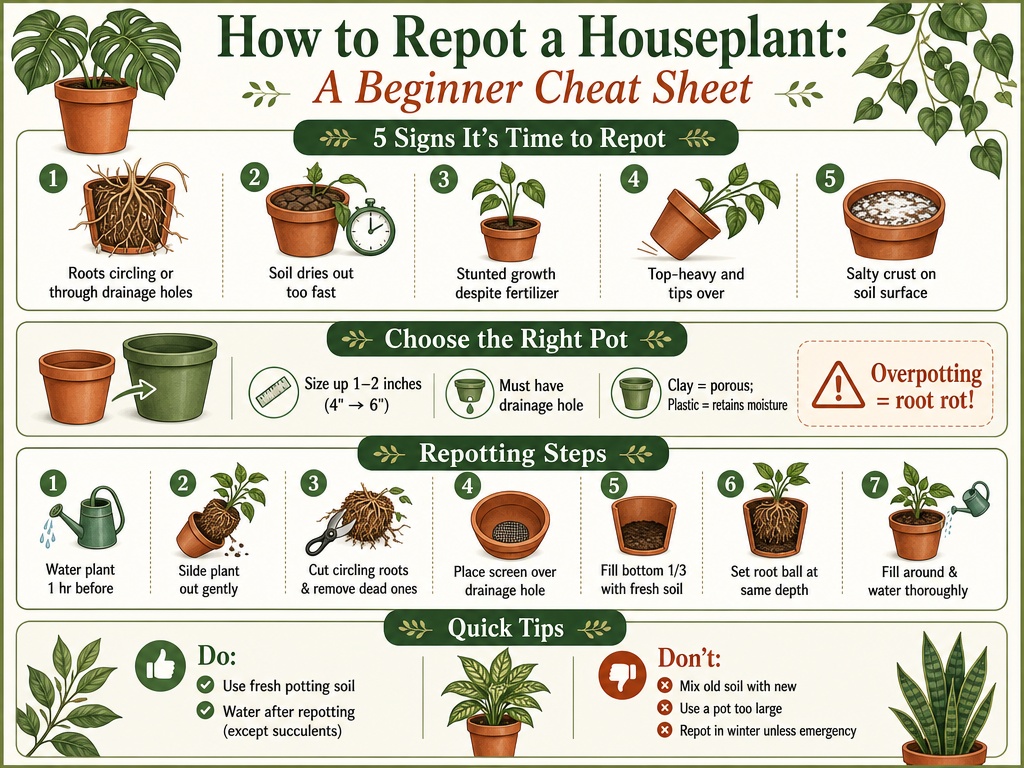
Watch for these warning signs:
- Soil dries out very fast — you're watering far more often than before.
- Roots poke through the drainage holes at the bottom of the pot.
- Growth has slowed or stopped, even when you fertilize in spring and summer.
- The plant is top-heavy and tips over easily.
- New leaves come in small.
- A white, salty crust forms on the soil surface (University of Arkansas; Penn State).
Confirm It's Pot-Bound
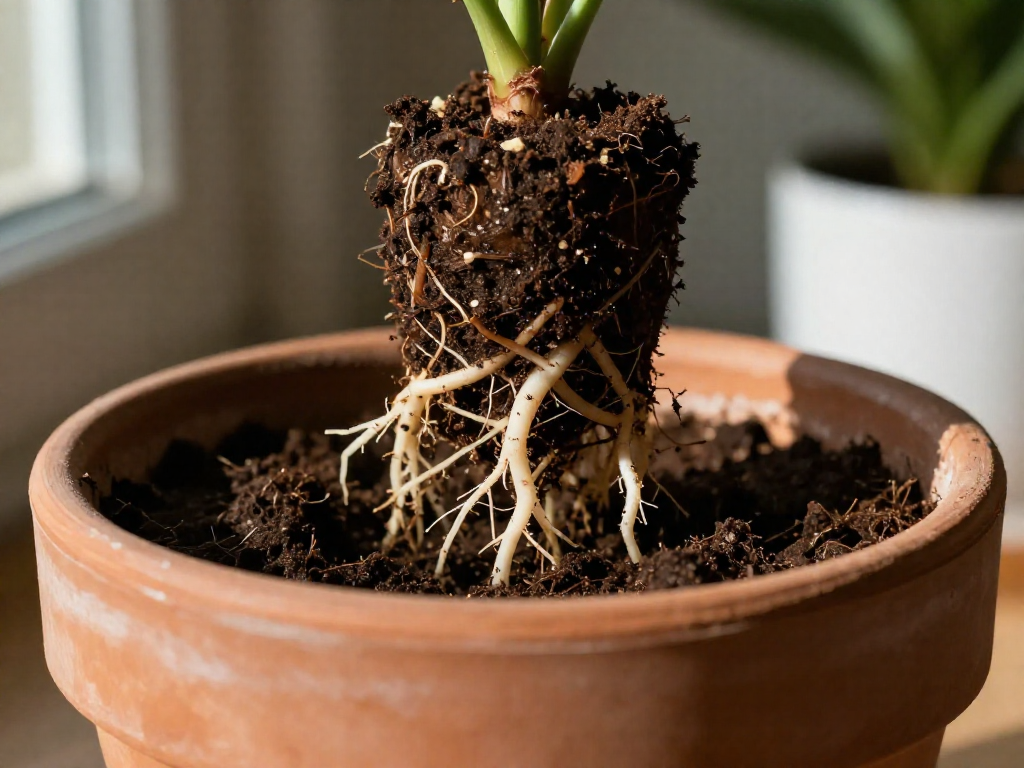
To be sure, gently slide the plant out of its pot and look at the roots. If they circle around the outside of the root ball, or are so dense you can't see any potting mix in the bottom third, the plant is pot-bound—its roots have run out of room—and it's time to move up a size (Penn State).
If none of these signs are present, your plant is fine where it is. Repotting a healthy, comfortable plant creates more risk than benefit.
Choosing the Right Pot (Bigger Is Not Better)
When you repot, size up just one step: pick a pot only 1–2 inches larger in diameter than the current one (about 30% bigger). Most pots follow a horticulture sizing system that goes by 2s—2, 4, 6, 8 inches—so a 6-inch plant moves into an 8-inch pot, not a 12-inch one. Bring a tape measure when you shop.
Why a too-big pot backfires
It feels generous to give a plant lots of room, but roots don't rush to fill new space—they grow slowly. Drop a small root ball into a big pot and it's surrounded by soil the roots can't drink from fast enough. That soil stays soggy, oxygen can't reach the roots, and they begin to rot. Waterlogged soil causes root rot, the single most common way houseplants die—more than underwatering.
The trap is that damage is delayed. Overpotting (potting into a container that's too large) often looks fine at first, then shows up weeks or months later as yellowing leaves, brown edges, dropped leaves, wilting, or stalled growth.
Myth-buster: a huge pot will not make your plant grow bigger, faster. It usually does the opposite.
Drainage and material
Two things to check before you buy:
- It must have a drainage hole. Without one, it's nearly impossible to water correctly. Pretty holeless containers are sleeves—decorative covers for a real pot—not planters.
- Match the material to the plant. Terracotta (unglazed clay) is porous and lets soil dry out faster, making it ideal for succulents and cacti. Plastic holds moisture longer and suits thirsty tropicals.
Plants that like it snug
Not everything wants an upgrade. Succulents, cacti, bromeliads, and sansevierias (snake plants) are happy being root-bound and can stay in the same pot for years. When in doubt, err on the small side—a snug fit is safer than a swamp.
What You'll Need Before You Start
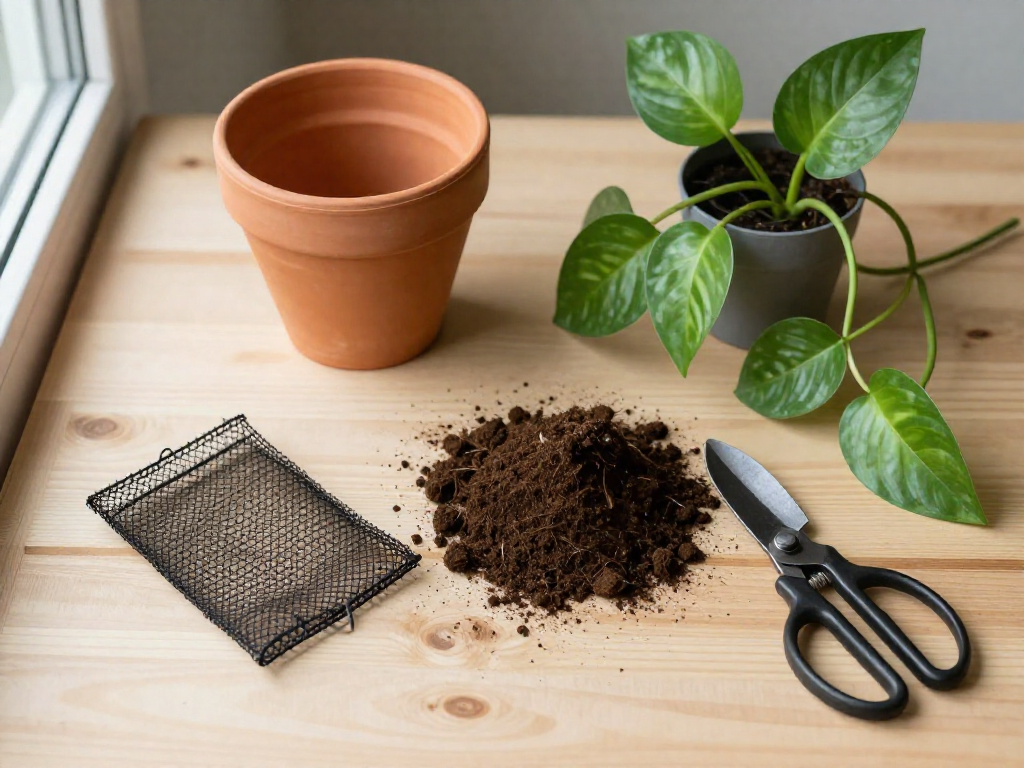
Gather everything before you begin so you're not scrambling with dirt on your hands. Here's your checklist:
- A new pot that's correctly sized (only slightly larger than the current one) with a drainage hole, plus fresh potting mix.
- A small square of window screen or mesh to lay over the drainage hole. It lets excess water drain out while keeping the potting mix in (Penn State).
- Fresh potting soil only. Never use garden soil, which is too heavy for houseplants, and never mix old soil with new. Fresh mix gives your plant the nutrients, drainage, and aeration it needs to grow (Joy Us Garden).
- Basic tools: a butter knife or small trowel to loosen roots, scissors or pruners to trim, gloves, and newspaper or a tarp to catch the mess.
Prep the pot first. If you're reusing a pot, wash and sanitize it with 1 part bleach to 9 parts water to kill any lingering pests or disease. If your new pot is unglazed clay (terracotta), soak it in water overnight so it won't wick moisture away from your fresh potting mix (Penn State).
How to Repot a Houseplant, Step by Step
Once you have your new pot and fresh potting mix ready, repotting takes about 15 minutes. Work on a table covered with newspaper or an old towel, and follow these eight steps.
Step 1: Water first, then wait
Water the plant in its original pot 1 to 4 hours before you start (a day or two ahead is also fine), then let it rest. You want the root ball moist but not soggy, which keeps the roots supple and holds the soil together. Penn State suggests letting it sit at least one hour before you begin.
Step 2: Remove the plant
Squeeze the sides of a plastic pot to loosen the soil, then slide a butter knife between the pot edge and the soil all the way around. Tip the pot on its side, support the base of the stem, and gently guide the plant free. Never yank it out by the stem.
Step 3: Loosen and inspect the roots
Gently tease the old soil away from the roots with a light touch. A few dead roots are normal, but a lot can mean the plant has been struggling.
Step 4: Trim problem roots
Cut any roots that circle the root ball (the mass of roots and soil), and remove dead ones. A slimy dead root usually points to a fungal issue or overwatering; a brittle, popcorn-like root usually means underwatering.
Step 5: Prep the new pot
Set a small square of mesh or screen over the drainage hole so water can escape but soil can't. Fill the bottom third of the pot with fresh mix.
Step 6: Position at the right depth
Set the plant so the top of the root ball sits at the same depth it was before, with the base of the stem about 1/4 to 1/2 inch below the rim. Add or remove soil underneath to get the height right. Never plant it deeper than it was—burying the stem invites rot.
Step 7: Fill and settle
Fill around the roots with fresh mix, gently pat it down, and tap the pot on the table a few times to settle the soil and close air pockets.
Step 8: Water based on plant type
For tropical houseplants (like pothos or peace lilies), water thoroughly right away until it runs from the drainage holes. For succulents and cacti, let them settle in dry and wait 4 to 7 days before the first watering.
Aftercare: Let the pot drain in its saucer for about 30 minutes, then dump any excess water so the roots don't sit in it.
Keeping a Plant the Same Size (Root Pruning)
Love your plant's current size? You don't have to size up every time you repot. If your plant is pot-bound (roots circling the root ball with little soil visible) but you're happy with how big it is, put it back in the same pot—or one the same size—instead of a larger one. This is perfect for renters and small apartments where you don't want a plant slowly taking over your windowsill.
To keep it from outgrowing that pot, do a quick root prune:
- Slide the plant out and loosen the root ball.
- Using clean scissors or a knife, cut off up to about one-third of the roots from the bottom.
- Repot into the same-size container with fresh potting mix (don't reuse the old soil).
Trimming the roots gives the plant room for new mix and nutrients without any extra pot space, so it stays roughly the same size and comfortably fits your space.
Aftercare and Common Mistakes to Avoid
Your plant just went through a big change, so a little droop over the next few days is normal—not a sign you did something wrong. Keep it out of harsh, direct sun for about a week while the roots settle, and hold off on fertilizer. Fresh potting mix already contains enough nutrients, and feeding a stressed plant too soon can burn tender roots.
Watering depends on the plant. For tropical houseplants, water right after repotting until it runs out the drainage holes. For succulents and cacti, let them settle in dry and wait 4–7 days before the first drink.
The most common beginner mistakes
- A pot that's too big. Go up just 1–2 inches; excess soil stays wet and drowns the roots.
- No drainage hole. Always use a pot that lets water escape.
- Planting too deep. Set the top of the root ball at the same level it sat before.
- Reusing old, spent soil. Start fresh for better drainage and nutrients.
- Watering succulents right after repotting. Give them a few days first.
Remember: waterlogged soil kills more houseplants than underwatering (Swansons Nursery). When in doubt, wait.
Sources
- Repotting Houseplants — extension.psu.edu
- Repotting Houseplants | How to tell when your plant needs repotting. — uaex.uada.edu
- 6 Common Signs Your Plant Has Outgrown Its Pot—Plus How to Fix It — thespruce.com
- When & Why to Repot Houseplants for Thriving Indoor Plants — joyusgarden.com
- Houseplant Repotting Guide - Pistils Nursery — pistilsnursery.com
- How to Repot a Plant — Swansons Nursery — swansonsnursery.com
- Repotting Guide: Finding the Perfect Pot — fifthseasongardening.com
- Overpotting | RHS Advice — rhs.org.uk
FAQ
How often should I repot my houseplant?
Most houseplants only need repotting once every three to five years, and few need it more than once a year. It depends on the plant's growth rate: fast growers may need a fresh pot annually, while slow, snug-loving plants (like succulents, cacti, bromeliads, and snake plants) can go several years. Repot when you see the signs it has outgrown its pot rather than on a fixed schedule.
What time of year is best to repot houseplants?
Spring is the best time, just before the active growing season begins. Repotting then lets the plant adjust to the fresh potting mix (the soil-like medium plants grow in) and quickly send new roots into it while it's naturally producing new growth. Summer works well too, and in mild climates early fall is fine. Winter isn't ideal, but repot anyway if the plant has an urgent problem like root rot or bad soil.
How much bigger should the new pot be?
Go up just one pot size, typically 1 to 2 inches larger in diameter (for example, from a 4-inch pot to a 6-inch pot). Pots often follow a sizing system that steps up by 2s, so bring a measuring tape when shopping. Avoid jumping to a much larger pot: the extra soil holds water the small root system can't absorb, staying wet too long and causing root rot, which is the most common way houseplants die. If you're happy with the plant's current size, use the same-size pot instead.
Do I need to water my plant right after repotting?
For most tropical houseplants, yes. Water thoroughly right after repotting, slowly and until water runs out the drainage holes and the pot feels heavy. Let it drain in the saucer for about 30 minutes, then dump any excess so the roots don't sit in standing water. The exceptions are succulents and cacti: let them settle in dry and wait about 4 to 7 days before their first watering to avoid rot.
Can I reuse the old potting soil?
No. Use fresh potting soil rather than mixing in the old mix. Over time old soil loses nutrients and becomes compacted, which hurts drainage and aeration (the air pockets roots need to breathe). Fresh mix restores nutrients, drainage, and airflow to support healthy new growth. Don't use garden soil either, it's too heavy for containers. If the plant had a salty crust on the surface or any disease, replace as much of the old soil as you can.
Why is my plant drooping after repotting?
Some drooping is normal transplant stress; the roots were disturbed and need time to settle in, so keep the plant in stable light and don't overwater. If it doesn't recover, check for two common causes. First, overpotting: a pot that's too large stays wet too long, suffocating and rotting the roots, which shows up as wilting, yellowing, and leaf drop over the following weeks. Second, damaged roots: slimy roots point to overwatering or fungal issues, while brittle, popcorn-like roots point to underwatering. Adjust your watering and, if needed, move the plant back to a snugger pot with fresh mix.
What if my decorative pot has no drainage hole?
A planting pot needs a drainage hole; without one it's nearly impossible to water correctly and water pools at the bottom, leading to root rot. Treat a decorative pot with no hole as a sleeve, or 'cachepot': keep the plant in a plain nursery pot with drainage holes and set that inside the decorative one. When you water, lift out the inner pot, let it drain fully, then place it back. Alternatively, drill a drainage hole in the decorative pot if the material allows.
See also
- How to Water Houseplants: A Beginner's Guide
- The Best Potting Soil for Indoor Plants
- Terracotta vs. Plastic Pots: Which Is Right for Your Plant?
- How to Tell If You're Overwatering Your Houseplant
- Root Rot: How to Spot It and Save Your Plant
- Beginner-Friendly Houseplants for Small Apartments
Related articles
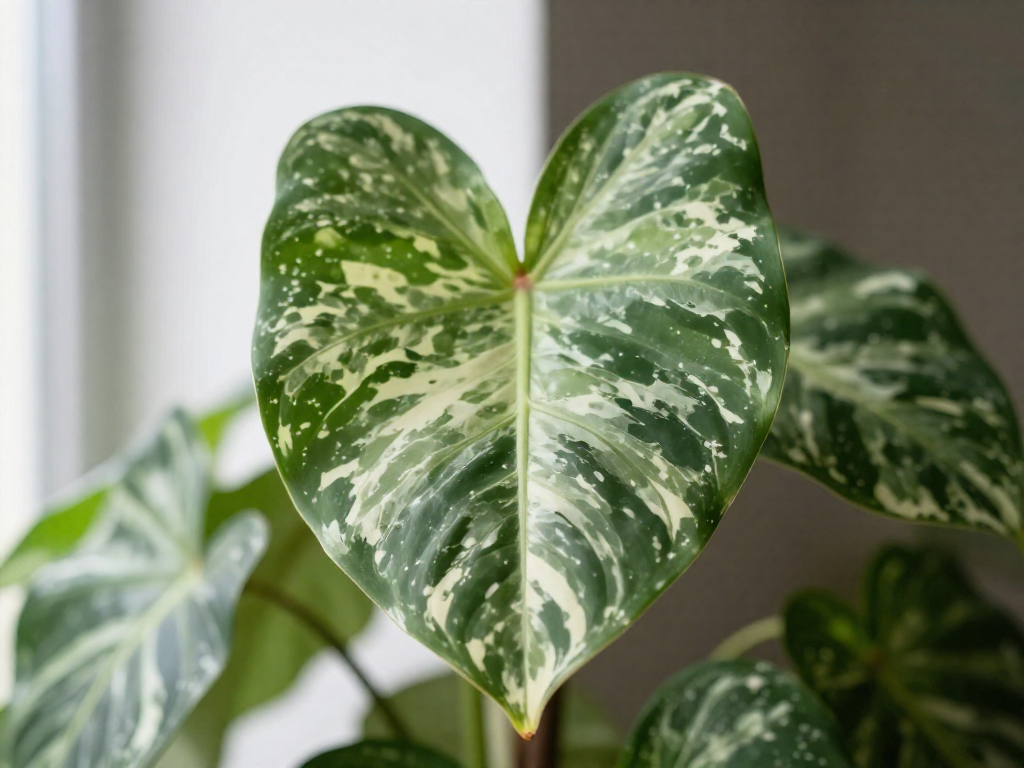
A Beginner's Glossary of Houseplant Terms
Confused by plant jargon? This plain-language glossary defines the houseplant terms beginners hit most—nodes, variegation, perlite, root-bound and more.
Jul 14, 2026 · 6 min read
How to Clean Dusty Houseplant Leaves (and Why It Matters)
Dusty leaves block light and slow plant growth. Learn the simple, safe way to clean houseplant leaves by type—plus what to avoid, like leaf shine sprays.
Jul 14, 2026 · 6 min read
Winter Houseplant Care: Watering and Light When Days Get Short
Learn how to care for houseplants in winter: cut back watering, boost light and humidity, and pause feeding so your plants survive short, dark days.
Jul 14, 2026 · 11 min read